|
<< Click to Display Table of Contents >> Emailing Reports |
  
|
|
<< Click to Display Table of Contents >> Emailing Reports |
|
When a report has been generated, one of the options presented to you will be an [Email...] button. Clicking on this option will present the following dialog:
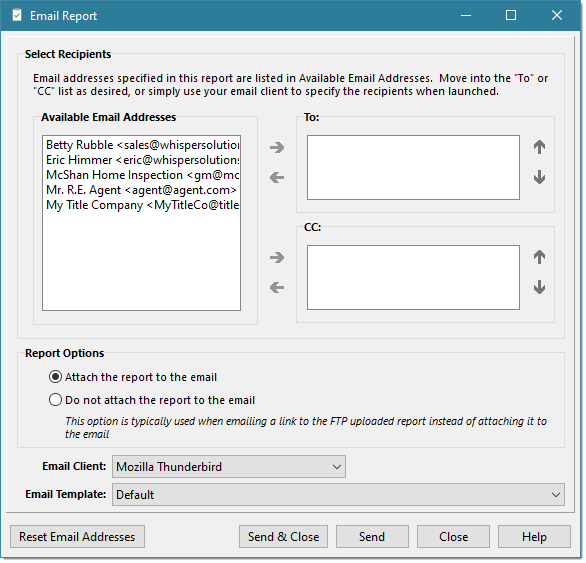
In the Available Email Addresses section will be a list of any emails found the system, either in certain areas of the report and those found in a Picklist named "Email Addresses". Email addresses in the Picklist can be in any one of the format examples:
Examples:
lesliedoe@gmail.com
Leslie A. Doe <lesliedoe@gmail.com>
Select the emails in this Available Email Addresses list (if any) and move to either the To: or CC: sections by either clicking on the respective right arrow button or double clicking an entry. The double clicking an email address will move it to the last To: or CC: that an email address was moved into (default being the To: section). Likewise, to remove an email address from either the To: or CC: sections, either double click an email or select it and click the respective left arrow button.
The Report Options section allows you to decide if you want to include the generated report as an attachment to the email. By default, it will attach the report; however, if you uploaded the report to your FTP server by clicking the [FTP...] button just prior to clicking the [Email...] button after a report was generated, it will default to not attaching the report and will instead resolve the $ReportURL tag in the body of the email template based on your FTP settings.
Finally, select the Email Client and Email Template you want to use for the email. Only the available email clients found on your system and the email templates configured in Preferences > Email will be listed.
Typically you would then click the [Send & Close] button which will invoke the email client chosen and then close the Email Report dialog. However, you might want to email the same report separately to different people and possibly use a different email template to those people. In this case, you can just click the [Send] button which will still invoke the email client specified but will also keep the Email Report dialog opened so you can quickly send the report multiple times to various people using various templates. Use the [Reset Email Addresses] button to quickly clear out both the To: and CC: email address list.
Note: Some email clients do not bring their email compose window to the forefront. WhisperReporter Ascent attempts to bring Outlook and Thunderbird email compose windows to the forefront, but with other email clients this might be an issue. In those cases, you may have to bring it forward manually using the Windows task bar. If you run into this problem, let us know what your email client is and we can possibly add support for bringing its compose window forward as well.
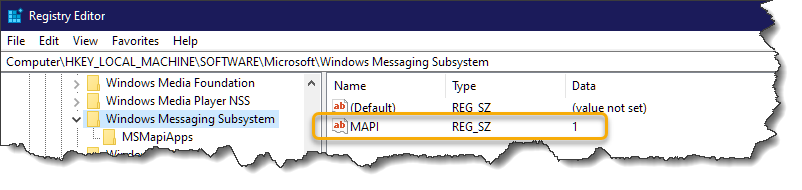
Some installations of Windows or email clients may not have fully enabled the MAPI interface. If you receive and Error Code of 1 when attempting to send an email (indicating an unknown function), please check for the following settings in the registry using the Windows RegEdit utility, adding them if missing (we'll be happy to help you with this if needed). Please note that the WOW6432Node referenced in the 2nd key below is only found on 64bit Windows.
•HKEY_LOCAL_MACHINE\SOFTWARE\Microsoft\Windows Messaging Subsystem
If missing, add a new string value of MAPI with a data value of 1
•HKEY_LOCAL_MACHINE\SOFTWARE\WOW6432Node\Microsoft\Windows Messaging Subsystem
If missing, add a new string value of MAPI with a data value of 1
Sample:
See also:
Email (Preferences)
FTP (Preferences)