|
<< Click to Display Table of Contents >> Using an existing report |
  
|
|
<< Click to Display Table of Contents >> Using an existing report |
|
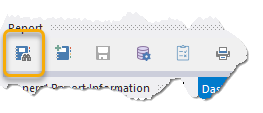
You can use WhisperReporter Ascent's Dashboard to open the last report, or a recently modified report, that you were working on. However, if you need to find a previous report, you can bring up the Browse Reports dialog. To invoke the Browse Reports dialog, you can use the menu sequence: File > Browse Report, or click the [Browse Reports} icon button on the main toolbar:
The list of reports and templates is color and attribute coded as follows:
Black |
An inspector created report that is not locked (not completed) and has no balance due. |
Red |
An inspector created report that is locked (completed). |
Blue |
A Whisper distributed report or template that is not locked. |
Purple |
A Whisper distributed report or template that is locked. |
Green |
A report that has a balance due. Using the Report Status filter, you can filter the list to only show those reports having a balance due. You can right click on a report having a balance to apply a payment without the need to open the report. |
Underlined |
A report that is marked as a Template. A report can be marked or unmarked as a template by selecting one or more reports and right clicking and selecting "Convert Selected Report(s) into Template(s)" menu item from the pop-up menu. Using the Report Status filter, you can filter the list to only show those reports that have been marked as a template. |
Note: Locking a report serves several purposes:
1.Visual indication that the report is complete.
2.Prevents accidental modification of the report (such as forgetting to create a new report based on a template and instead started modifying the template for your new report.
3.Allows the browse list to have locked/completed reports filtered out in order to show only those reports that are not completed.
4.Optionally finalize edited images to free up space in the database. Edited images take up about twice the space you might expect because it keeps two copies of the image: one with the objects merged into a JPG image that is used in the report itself, and another with the original base image plus all objects (arrows, circles, etc) still available for modification. When an image is finalized, you can still edit the image, but previous objects are no longer available to be moved, modified or deleted because they have been merged into the base image.
Locating a report
There are several ways to locate a report. You can click on a column heading to sort the list by that column and/or use the filters at the top of the list. The filters are as follows:
Report View |
If you create reports using different Report Views, for example, Termite vs Residential inspections, you can filter on the type of report using this filter.
|
Inspector |
If you have merged reports from several inspectors, you can use this filter to show only those created by a specific inspector. You also have to option to re-assign ownership of a report to another inspector. To do this, select one or more reports in the reports grid, then right-click and select "Change owner or selected report(s) to". This will expand to show a list of licensed inspectors found in your database. Just select the inspector you want to assign the report to, and confirm the choice.
|
Real Estate Agent |
Filters the list of reports where the real estate agent selected had been specified as either the buyer's or seller's real estate agent.
|
Text Match |
If you can recall something about an inspection, such as the client name or the property address, you can use this filter. Just type in some text, and it will automatically filter the list by showing only those reports having that text in any of the columns shown (it also searches postal codes even though it is not shown in the grid)
|
Only Templates |
This filters the list to show only templates
|
Only Reports |
This filters the list to show only reports
|
Have balance due |
This filters the list to show only reports that have a balance due. You can also hide the Balance column which can improve the loading speed of the Browse dialog if you have a large number of reports. To hide the balance column, right click on the report list grid and from the pop up menu select to Show or Hide the balance column.
|
Not complete (unlocked) |
This filters the list to only show reports not yet completed (i.e. those reports not locked).
|
Once you have the report you want to open, either double-click the report or select it and click [OK].