|
<< Click to Display Table of Contents >> Positioning Images |
  
|
|
<< Click to Display Table of Contents >> Positioning Images |
  
|
Images can be positioned simply by dragging the image to the desired location. The final resting place is determined by its positioning attribute. By default, images are positioned as a character. If you change the positioning attribute of an image, the next image you insert will also have that new positioning attribute. To change the positioning attribute, select an image that has been inserted into the topic then right click and select the menu item "Set Image Positioning Style to" which will bring up the choices mentioned below.
Note: Any selection other than "Standard In-Line" will cause the image to become a "floating" image relative to a paragraph rather than in-line as a character. When one of these "floating" options is used an the image is selected, you will see a dotted line and a pin to illustrate which paragraph the image will be positioned relative to, i.e. how many pixels down and to the right of the start of the paragraph the image will be positioned. Issues as to how this image will be positioned if the report generation causes the paragraph to split between pages can be addressed in the Preferences for Report Generation Options: "Don't adjust floating image position at a page break".
Note: When images are floating, especially in the case of "Image under text", you may have to hold the shift key down in order to select the image for editing, otherwise the editor might think you are trying to select the foreground text rather than the image.
Standard In-Line (positioned in-line as a character)
The image is positioned in-line with other text as if it is just another character. In the sample to the right, the inspector added three images in a row and are treated as three separate characters. If another was added, it would automatically wrap to the next line. |
|
Autowrap Text: Left Or Right (positioned relative to paragraph)
Text will flow either to the right or left of the image depending on the position of the image. To prevent the page break issue mentioned above, it is sometimes recommended to use in-line images and use a two column table instead to achieve the same result (i.e. text in one column, and the image in another). |
|
Autowrap Text: Left And Right (positioned relative to paragraph)
Text will flow on both sides of the image. |
|
No Text Wrap: Image Under Text (positioned relative to paragraph)
The image will appear behind any text, causing text to overlay on top of the image itself. See the note above concerning how to select an image behind text.
|
|
No Text Wrap: Image Over Text (positioned relative to paragraph)
The image will hide any text that will be under the image. |
|
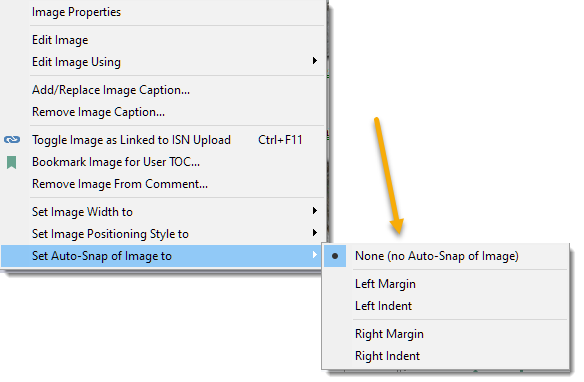
For these "floating" images, you have some additional alignment options to help keep position of multiple images consistent, saving time.

Alignment commands:
Left Margin - Image is moved to the left margin of the page
Left Indent - Image is moved to the left indent of the paragraph it is pinned to
Right Margin - Image is moved to the right margin of the page
Right Indent - Image is moved to the right indent of the paragraph it is pinned to
Alignment Attributes:
No Auto-Snap of image
When dragging an image, do not auto-snap the image alignment
Auto-Snap to Margin
When dragging an image, auto-snap the image to the left or right margin, depending on the direction you are dragging the image (dragging left will auto-snap to the left margin, dragging right will auto-snap to the right margin).
Auto-Snap to Indent
When dragging an image, auto-snap the image to the left or right indent, depending on the direction you are dragging the image (dragging left will auto-snap to the left indent, dragging right will auto-snap to the right indent).