|
<< Click to Display Table of Contents >> Editing Images |
  
|
|
<< Click to Display Table of Contents >> Editing Images |
|
WhisperReporter Ascent has built-in tools for quick and simple photo editing. Access the image editor one of several ways:
1.Double- click on the image you want to edit.
2.Right-click on the selected image you want to edit and select Edit Image
3.Select one or more images from an image panel and right click to select Edit Selected Images.
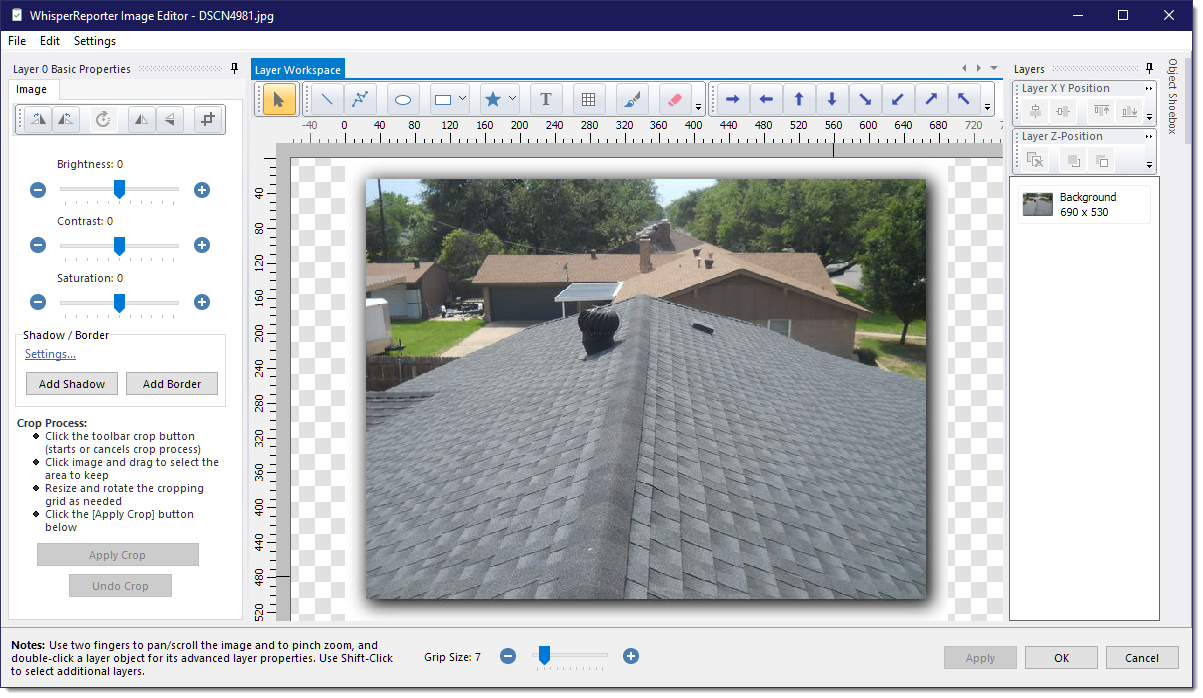
Main Toolbar

Starting from left to right:
•Selection - Enters a mode used to select and resize object layers.
•Line - Draw individual lines of various styles including an assortment of endpoints like arrowheads. It can be used to draw arrows of varying length instead of using fixed shape arrow objects also found on the toolbar.
•Polyline - Used to draw line shapes and can be closed to form polygons. Useful for sketching property boundaries such as for wood destroying insect report sketches.
•Oval - Inserts an oval shaped object.
•Rectangle - Inserts a rectangle shaped object.
•Shape - Insert a pre-defined shape. You can select from a list of pre-defined shapes using the dropdown: Triangle, Diamond, Star or one of four balloon pop-out shapes. Once inserted, you can double click the shape to change it to another shape from a list of a number of various shapes.
•Text - Insert text, including tags for Watermark Overlays (see Adding a Text Layer described below).
•Grid - Add a grid to the whole image. You will be able to select the number of rows and columns as well as color and labels for rows and columns if desired. Labels are useful to describe a location of concern instead of using other drawing tools.
•Paint brush - Free hand drawing tool.
•Eraser - Erases parts of an image. Note: the erased area becomes transparent. If you intended the erased area to be white, use the Paint Brush tool using a white color.
•Arrows - For consistent arrow insertion, you can use these fixed arrow shapes instead of the line drawing tool for arrows.
Layer Toolbar
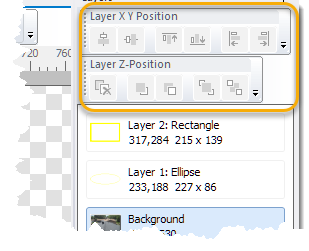
The Layer Toolbar is used to manipulate one or more object layers.
Layer X Y Position - a set of tools to align objects. Tools are (from left to right):
•Horizontally center selected object layer(s)
•Vertically center selected object layer(s)
•Align selected object layer(s) to the top
•Align selected object layer(s) to the bottom
•Align selected object layer(s) to the left
•Align selected object layer(s) to the right
Layer Z-Position - a set of tools to remove or order the selected object layer(s) in regards to their position from front to back in layer order such as when you want to overlap one object layer with another. Tools are ( from left to right):
•Delete the selected layer(s)
•Move the selected object layers(s) forward one layer
•Move the selected object layers(s) backwards one layer
•Move the selected object layers(s) all the way forward above all other layers
•Move the selected object layers(s) all the way backwards below all other layers
Image Layer Toolbar
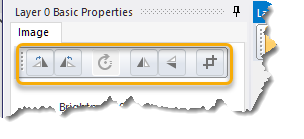
When an image layer, including the base image, is selected, the left panel of the editor will show various functions you can perform on the image layer such as brightness, contrast, rotate, crop, etc. The toolbar buttons are as follows (left to right):
•Rotate Right (clockwise) - Rotates the image layer in 90 degree increments clockwise
•Rotate Left (counter-clockwise) - Rotates the image layer in 90 degree increments counter-clockwise
•Rotate (Variable rotation) - Allows an image layer, other than the base image, to be rotated freely as needed.
•Flip Horizontally (left-right) - Flips the image layer horizontally
•Flip Vertically (top-bottom) - Flips the image layer vertically
•Crop - Starts a crop function. Using your mouse or finger, start dragging over the area you want to crop (you can cancel the crop by simply clicking the crop button a 2nd time). To rotate the cropping grid, move the mouse to any corner of the grid until the cursor symbol changes to a rotate symbol, then hold the mouse button down and rotate as needed. Once you have to area to crop, click the [Apply Crop] button.
Adding a Text Layer
When selecting to insert a text layer, you will be prompted something like the following:
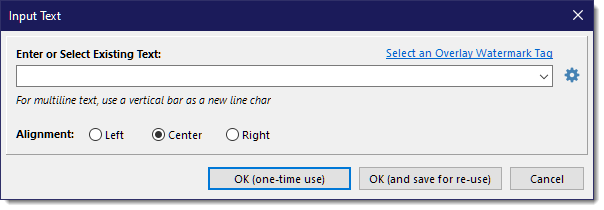
Two options may appear above the text entry field depending on what's available for the image you are editing.
•Use the photo's internal timestamp (not shown above)
If the image you are editing is a photo and it contains a timestamp as part of its internal EXIF data, you will have this option to use it for the text layer.
•Select an Overlay Watermark Tag (shown above)
This option will only appear if you are editing a Watermark from the Watermark Manager. This is only useful if the watermark will be printed as an overlay (printed last on the page) vs a standard watermark (printed first on a page). The tags will only be resolved for overlay watermarks because you should use normal topic comment tags for standard watermarks. Overlay watermarks mask out anything not in its transparent area, therefore you need to add the tags to the image in those places that are not transparent.
You also have the option to define how the text should be aligned within the text layer itself, the initial default being to Center the text. This is mostly useful when using tags for watermark overlays when you don't know what the final width of the text will be until the tag is resolved. To change the alignment after inserting the text layer, you can double-click the text layer to open its extended properties where you can then modify the alignment as needed.
Once you have decided to use the text entered, click on either [OK (one-time use)] which will not auto save the text for later use, or click on [OK (and save for re-use)] to auto save the text into the ImageEditorTextItems.txt file (which is best managed by clicking the gear button to the right of the text entry field). If needed, the ImageEditorTextItems.txt file can be found in the ImageEditor's AppData path, for example:
C:\Users\<UserName>\AppData\Roaming\Whisper Computer Solutions, Inc\WhisperImageEditor
See also: