|
<< Click to Display Table of Contents >> Level Tags |
  
|
|
<< Click to Display Table of Contents >> Level Tags |
|
<$Level> tags are best created using the Level Tag Builder. Depending on where you are trying to add it, you can find it by using the Insert Tag toolbar button. For example, the popup menu sequence goes something like this (varies slightly depending on where you are adding it):
Insert Tag > Report > Topic/Subtopic > Level...
This invokes the Level Tag Builder and includes an example result as you define the level tag:
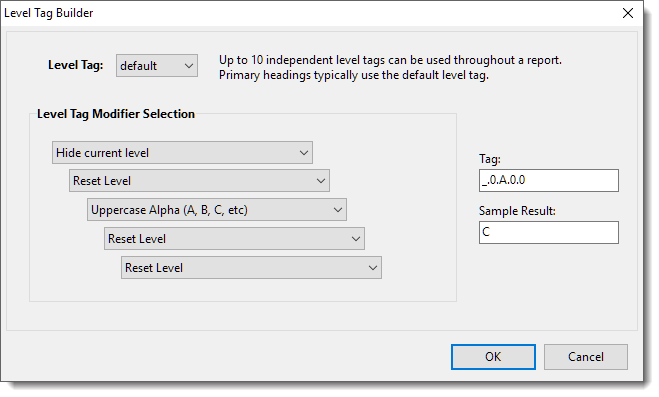
To explain one example: <$Level:_0.A.0.0.0>:
•the “_” indicates to hide the current level (level 1).
•the next “0” indicates to reset level 2 (restart increment )
•The “A” indicates to use an incrementing uppercase alpha char for level 3
•The remaining “0”s are to reset each of the following levels
Each entry is an instruction for that level (up to 5 levels):
•i or I : Roman Numeral (i, ii, iii, iv or I, II, III, IV, etc)
•a or A : Alpha (a, b, c or A, B, C etc)
•1 : Numeric (1, 2, 3 etc)
•? : Show current level
•_ : Hide current level
•0 : Hide and Reset level (reset restarts the incrementing at the beginning)
•- : Hide and reset this and all remaining levels (shorthand for specifying "0" for each remaining level)
Levels go from left to right. Typically the "default" level tag is used for Report Views, where level 1 is used for chapters and level 2 for topics, and the other levels for topic comment use. However, you can create other level tags for other reporting usages. Each one is used independently of the others to avoid conflict of incrementing values.