|
<< Click to Display Table of Contents >> Images |
  
|
|
<< Click to Display Table of Contents >> Images |
|
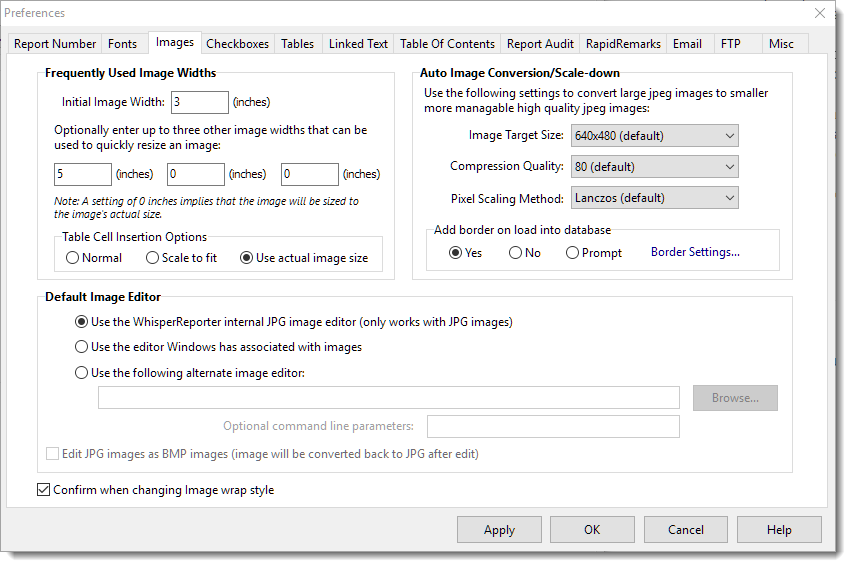
Frequently Used Image Widths
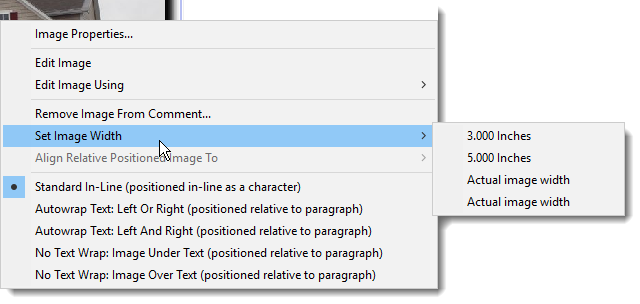
WhisperReporter saves you from having to resize photos whenever they are inserted into a report by allowing you to set default and frequently used widths. This means that all images will automatically be a consistent width when inserted into a report and consistent resizing can be made with the click of the button. The first setting, “Initial Image Width” is the default width images will be when inserted into a report. The other three fields will be available widths for an image once it has been inserted into the report. To change the image width to one of these alternate widths, right-click the image and hover over “Set Image Width”. You will see the alternate widths as well as the original default width (see image above). Clicking on one of these options will automatically resize the photo. The image size can be manually changed at any time by clicking on the image and moving an edge in and out.
Setting a width to zero will use the image's original size but still scaled to fit within the page size as needed.
Table Cell Insertion Options
•Normal
This option will treat the image insertion the same as if it was not being inserted into a table cell and will use the Initial Image Width setting.
•Scale to fit
Use this option to automatically scale the image to fit the table cell. Smaller images will be scaled up to fit and large images will be scaled down to fit. Be aware that if your image is very small, it might appear pixelated if the table cell is significantly larger than the actual image size.
•Use actual image size
Use this option to only have an image scale down to fit the table cell if the actual size is larger than the table cell. Smaller images will not be scaled up to fit.
Auto Image Conversion/Scale-down
When JPEG images are imported into WhisperReporter they can be automatically converted from their raw size and type to a smaller, more manageable, database and PDF friendly, high resolution JPEG. The system uses these three preferences to guide the conversion. The default settings are optimized for WhisperReporter and are not recommended that they be altered under normal cercumstances. Image types other than JPEG (.jpg) are not scaled.
Add border on load into database – These preferences determine whether images are imported into WhisperReporter with a 3D shadow border. The default preference is “Prompt”, which will ask you when you import if you would like a border or not. If you set this to “Yes”, then every photo will be imported with a border, you will not be asked. Likewise, if you set this to “No”, every photo will be imported without a border.
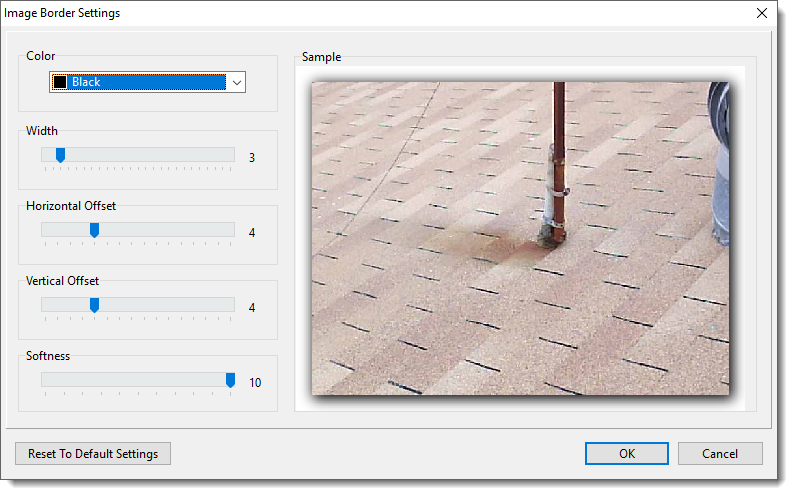
Border Settings – Clicking on Border Settings opens a separate window where you can adjust the shadow border’s size, position and color. Use the slider bars and color drop-down to make your changes. The Sample image on the right will display the result of your changes. Click [OK] to save you changes and return to the preferences window. Click [Cancel] to return without saving. The image shown below is showing the default settings which can be restored by clicking the [Reset to Default Settings] button.
Default Image Editor
Once images have been imported into the system you can make changes to the photo like add text or arrows. The changes will be made to an auto-created copy so the original photo will be preserved. The editor set by these three options is accessed by double-clicking on an inserted photo. The first option, “Use the WhisperReporter internal JPG editor”, sets the photo editor that comes with WhisperReporter as the default. The next option, “Use the editor Windows has associated with images” will set the default editor to be the same editor that your PC uses by default. This may be MS Paint, Windows Photo Manager, or software that came with your digital camera. To use software, such as Photoshop, that may not the Windows default, select the third option; “Use the following alternate image editor”. If you do not have any image editing software besides Paint installed on your PC, it is recommended that you use the WhisperReporter photo editor.
Edit JPG as BMP – If you elect to use Microsoft Paint to edit photos be sure to have this setting turned on. Some versions of Paint can only edit BMP files; WhisperReporter will do all the conversions for you.
Other options
Confirm when changing image wrap style - To prevent an accidental switch from how an image is positioned and/or its text wrap style, you can have WhisperReporter prompt for confirmation before the change takes effect. This is useful because WhisperReporter will apply the same positioning/wrap style to other images being inserted going forward, which might not be what you expected.