|
<< Click to Display Table of Contents >> Configuring the camera |
  
|
|
<< Click to Display Table of Contents >> Configuring the camera |
|
In order to use the Camera, you must configure it before the Camera icon will be available in the editor toolbar. To invoke the Camera Setup, use the Setup > Camera Setup menu sequence which invokes the following dialog:
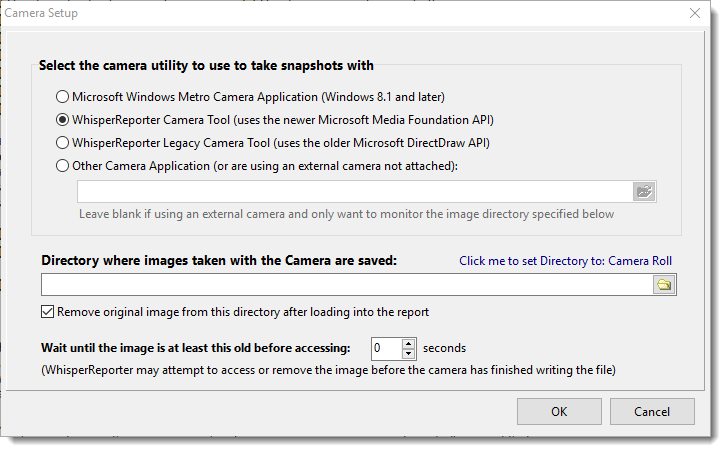
You have four camera utility options:
•Microsoft Windows Metro Camera Application
This uses the built-in Camera application provided by Windows. In many cases, this provides the best quality.
•WhisperReporter Camera Tool
This uses the newer Microsoft Media Foundations API to capture images. However, many camera manufactures want you to use their camera application, and as such don't always provide all the supported resolutions through the this API.
•WhisperReporter Legacy Camera Tool
This uses the older Microsoft Direct Draw API to capture images. However, many camera manufactures want you to use their camera application, and as such don't always provide all the supported resolutions through the this API.
•Other Camera Application
Choose this option if you want to take advantage of the camera manufacturer's own camera utility. This will provide all the features of the camera whereas the other choices might not. You can also leave this entry blank to simply provide for directory monitoring as described below, such as when using an external unattached camera that sends images over WiFi or Bluetooth to your PC.
You also will need to specify a directory folder where the images taken by the camera application chosen are saved. This does not necessarily configure the camera application, it simply tells WhisperReporter where those images can be found as saved by that application. The Microsoft Windows Metro Camera application saves images into the Camera Roll folder in your Pictures so it is recommended to use that folder. Simply click the link "Click me to set Directory to: Camera Roll" to auto fill the directory path. For each of the WhisperReporter Camera tools, it will use that directory specified; however, for any other camera application, you may need to configure it to use that directory folder or you will have to modify this WhisperReporter directory setting to the actual path used by that application.
Note: If you are using some other means to capture images other than a camera tool or an external camera that transfers their images over Wifi onto your computer, choose "Other Camera Application" and leave it blank. WhisperReporter will still monitor the directory folder specified for new images. One example of this is using your phone to take a photo that gets uploaded to DropBox. If your PC is also connected to DropBox, you could have WhisperReporter monitor the DropBox folder that uploaded images are sync'd to. When DropBox syncs, your image will be inserted into WhisperReporter provided the folder is being monitored, as explained in the Using the camera section. Some cameras can automatically transfer new photos over WiFi or Bluetooth into a folder on your PC. This same technique applies to those cameras as well.
Remove original image from this directory after loading into the report
You can have WhisperReporter delete the source image after it has been brought into WhisperReporter. We don't usually recommended doing this because you might need to access the original image at a later date as images brought into WhisperReporter are usually scaled down to conserve space in the generated report.
Wait until the image is at least this old before accessing
Depending on the resolution of the image being taken, WhisperReporter could at times attempt to grab the photo before the camera has finished writing the file. To help alleviate this contention, you should set a wait time to at least one second or more, dependent on the speed of the photo transfer by the camera.
See Also: